Web Editor for Applet in Box
Applet editor helps you to develop your Applet (HTML5 Players) that will work across all supported devices. It enables you to version your Applet, change (upgrade/downgrade) version of our Javascript API and to run your code within the Emulator. Bellow are explained all details regarding Applet Editor page.
devSpace · Availability: DevSpaceOverview
| Item | Description |
|---|---|
| Identification | Is used for REST API manipulation with the Applet |
| Version | Information about versioning of your Applet, create new versions of your Applet anytime you want & switch between older versions |
| Applet editor | Start your development here, insert your code, pick version of our Javascript API and run your code within an Emulator or a device through Code Mode |
Creating the first version
A newly created Applet has no versions yet. The Applet detail page offers three ways to create the first one:
- signageOS CLI
- The full development workflow with TypeScript and bundling. Install the CLI, generate an Applet project and upload it with
sos applet upload. More information about the CLI can be found here.
- The full development workflow with TypeScript and bundling. Install the CLI, generate an Applet project and upload it with
- HTML package (ZIP)
- Upload your already built application as a ZIP archive — no CLI installation needed. The archive is treated as your
distfolder and must contain anindex.htmlentry file at its root. Box creates version1.0.0as a multifile (CLI type) Applet from its contents.
- Upload your already built application as a ZIP archive — no CLI installation needed. The archive is treated as your
- Basic Applet Editor
- A single HTML file edited right in the browser using the Applet Editor described below.
If you zip the folder itself instead of its contents, Box strips the single wrapper folder automatically. macOS metadata files are ignored and empty files are skipped. If index.html is missing, the upload is rejected with an explanatory error and no version is created.
A package.json is required for the Applet build — if your archive doesn't include one, Box generates a minimal one automatically. If it does, Box keeps it (including sos.config) and only aligns its main field to the index.html entry file.
The upload form also offers an optional Configuration & platforms section. There you can define the Applet's configuration fields (name, value type, mandatory flag, description) and restrict the supported platforms — leaving platforms empty supports all of them. When creating a new version, both are prefilled from the previous version so you only adjust what changed.
General information
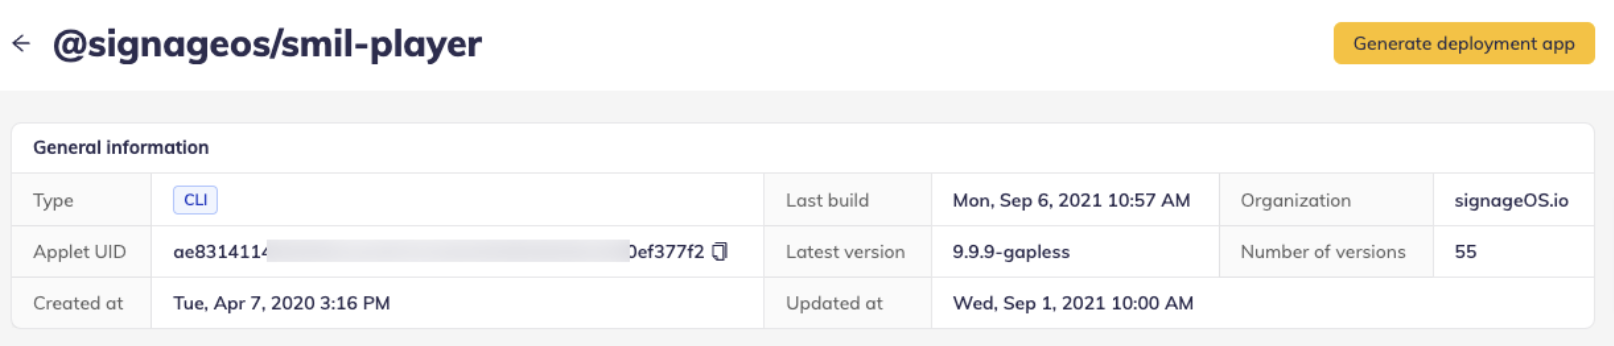
On the very top of Applet detail you will find section containing General information. These include information necessary for Identification - Applet UID.
Other information includes:
- Type
- This information indicates if the Applet is created through CLI or Basic (via web editor)
- Last build
- Date and time when the last build of this Applet occured
- Organization
- Contains the name of organization to which the Applet belongs
- Applet UID
- Necessary information for both REST API interaction and identification
- Latest version
- Identification of the latest available version
- Number of versions
- As your Applet is developed new versions will be numbered here
- Created at
- The date of creation for the Applet
- Updated at
- The date of latest update for your Applet
Version
Underneath General information you will find Version section. This section lets you switch between different versions of your Applet. On the right side of this section you can create a new versions as your development progresses.
Information in this section consists of:
- Version
- semver of your Applet
- Build status
- Once you've made your changes to your Applet, the changes need to be applied and Applet uploaded, this is done automatically via Build - you can check the readiness status via this information
- Last updated at
- The date and time of last update to your Applet
- Publishing status
- As you develop your Applet you can change the Status to several states
- Draft - unfinished changes, work in progress
- Published - finished current version, ready to be assigned to a device
- Deprecated - unused but archived code
- As you develop your Applet you can change the Status to several states
- Updated by
- As Organizations can have multiple users, it is necessary to keep track of version control and user control, here you can see who made the latest changes to the Applet code
- JS API (Front Applet version)
- Front Applet version to be used with the Applet more information about FA can be found here

Applet Editor
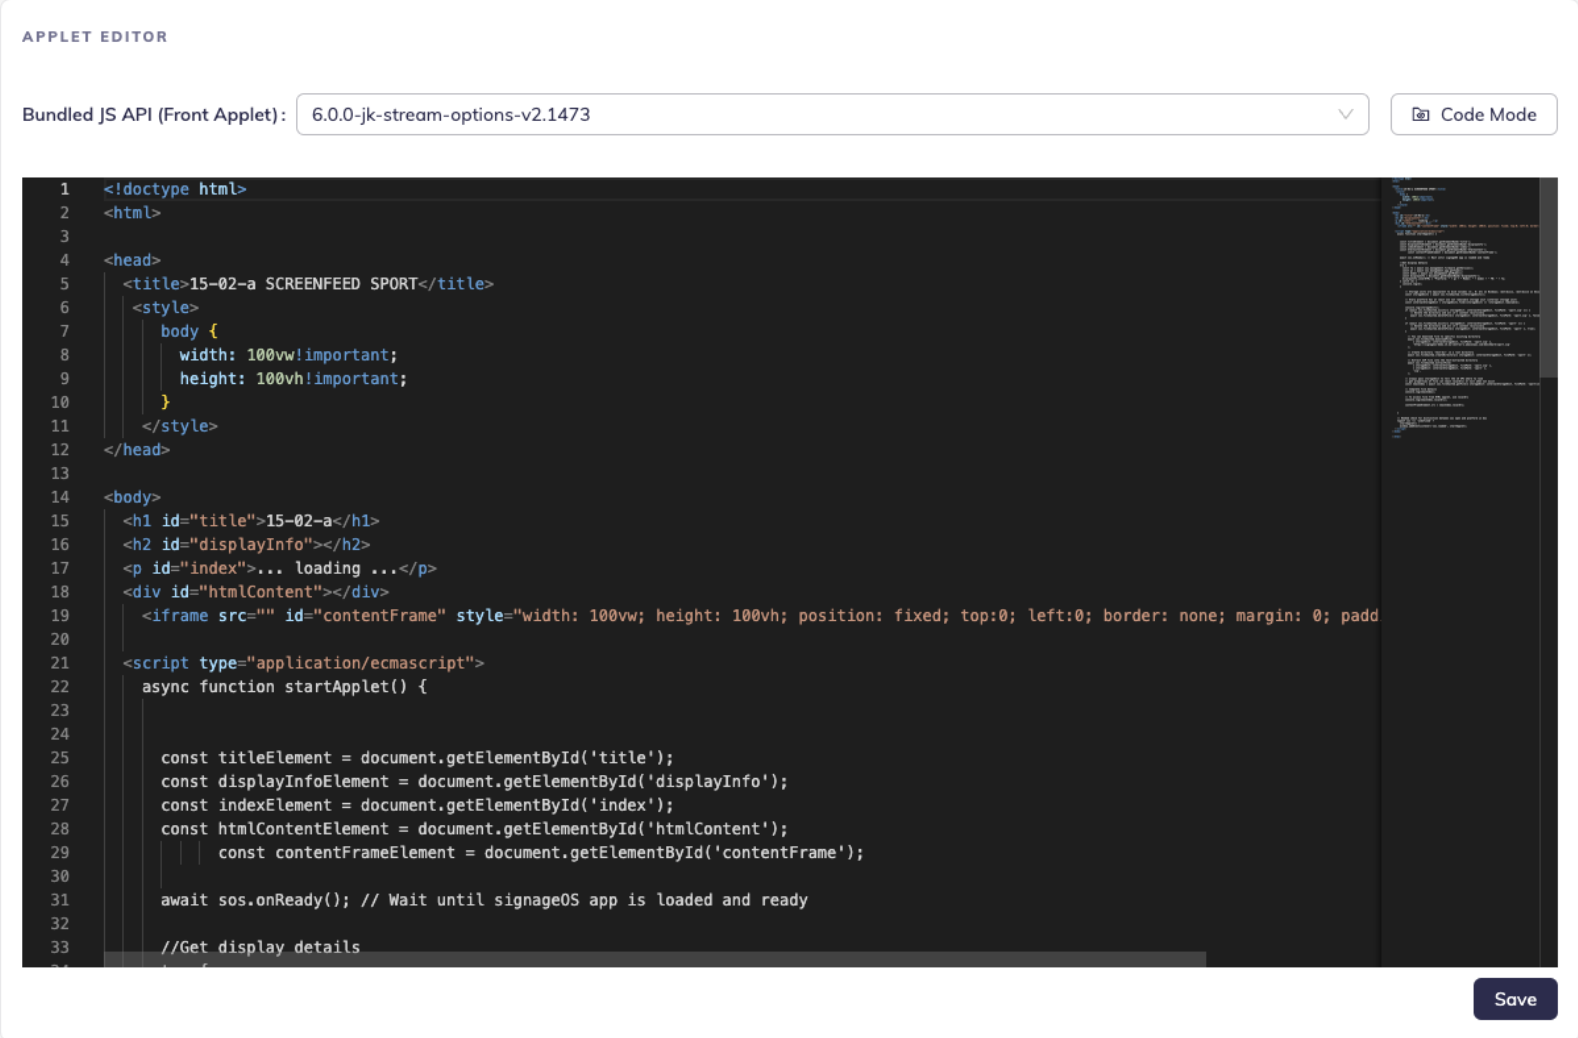
Next section contains the Applet Editor. If you are using Basic type of Applet (as opposed to CLI) you can start creating your code base here. You can find examples of Applet codes in our public GitHub repository.
From the top of the Editor you can also pick the version of our Javascript API. Each version has it’s own version of Javascript API.
The library that enclosed the Javascript API is called Front Applet. Version of the Front Applet are available under the Changelog category and are referenced from the Javascript API page.
Once you are satisfied with the changes made, save your changed on the bottom right corner of the editor.
Once you are done with the current development and you want to use your code in production we strongly recommend to Publish your Applet version. By publishing the version you disable any further modification of the code of currently selected version. So it makes sure anytime you push this version of your Applet into the device it will be the same.
Code Mode
Code Mode can be found in the top right corner of the editor. By clicking the Code Mode button the Editor will be shown fullscreen and offer additional functionality.
Applet configuration allows you to set up key-value pairs of your own configuration to be passed alongside the Applet. More information about Applet configuration, how to leverage and use it can be found in our documentation here.
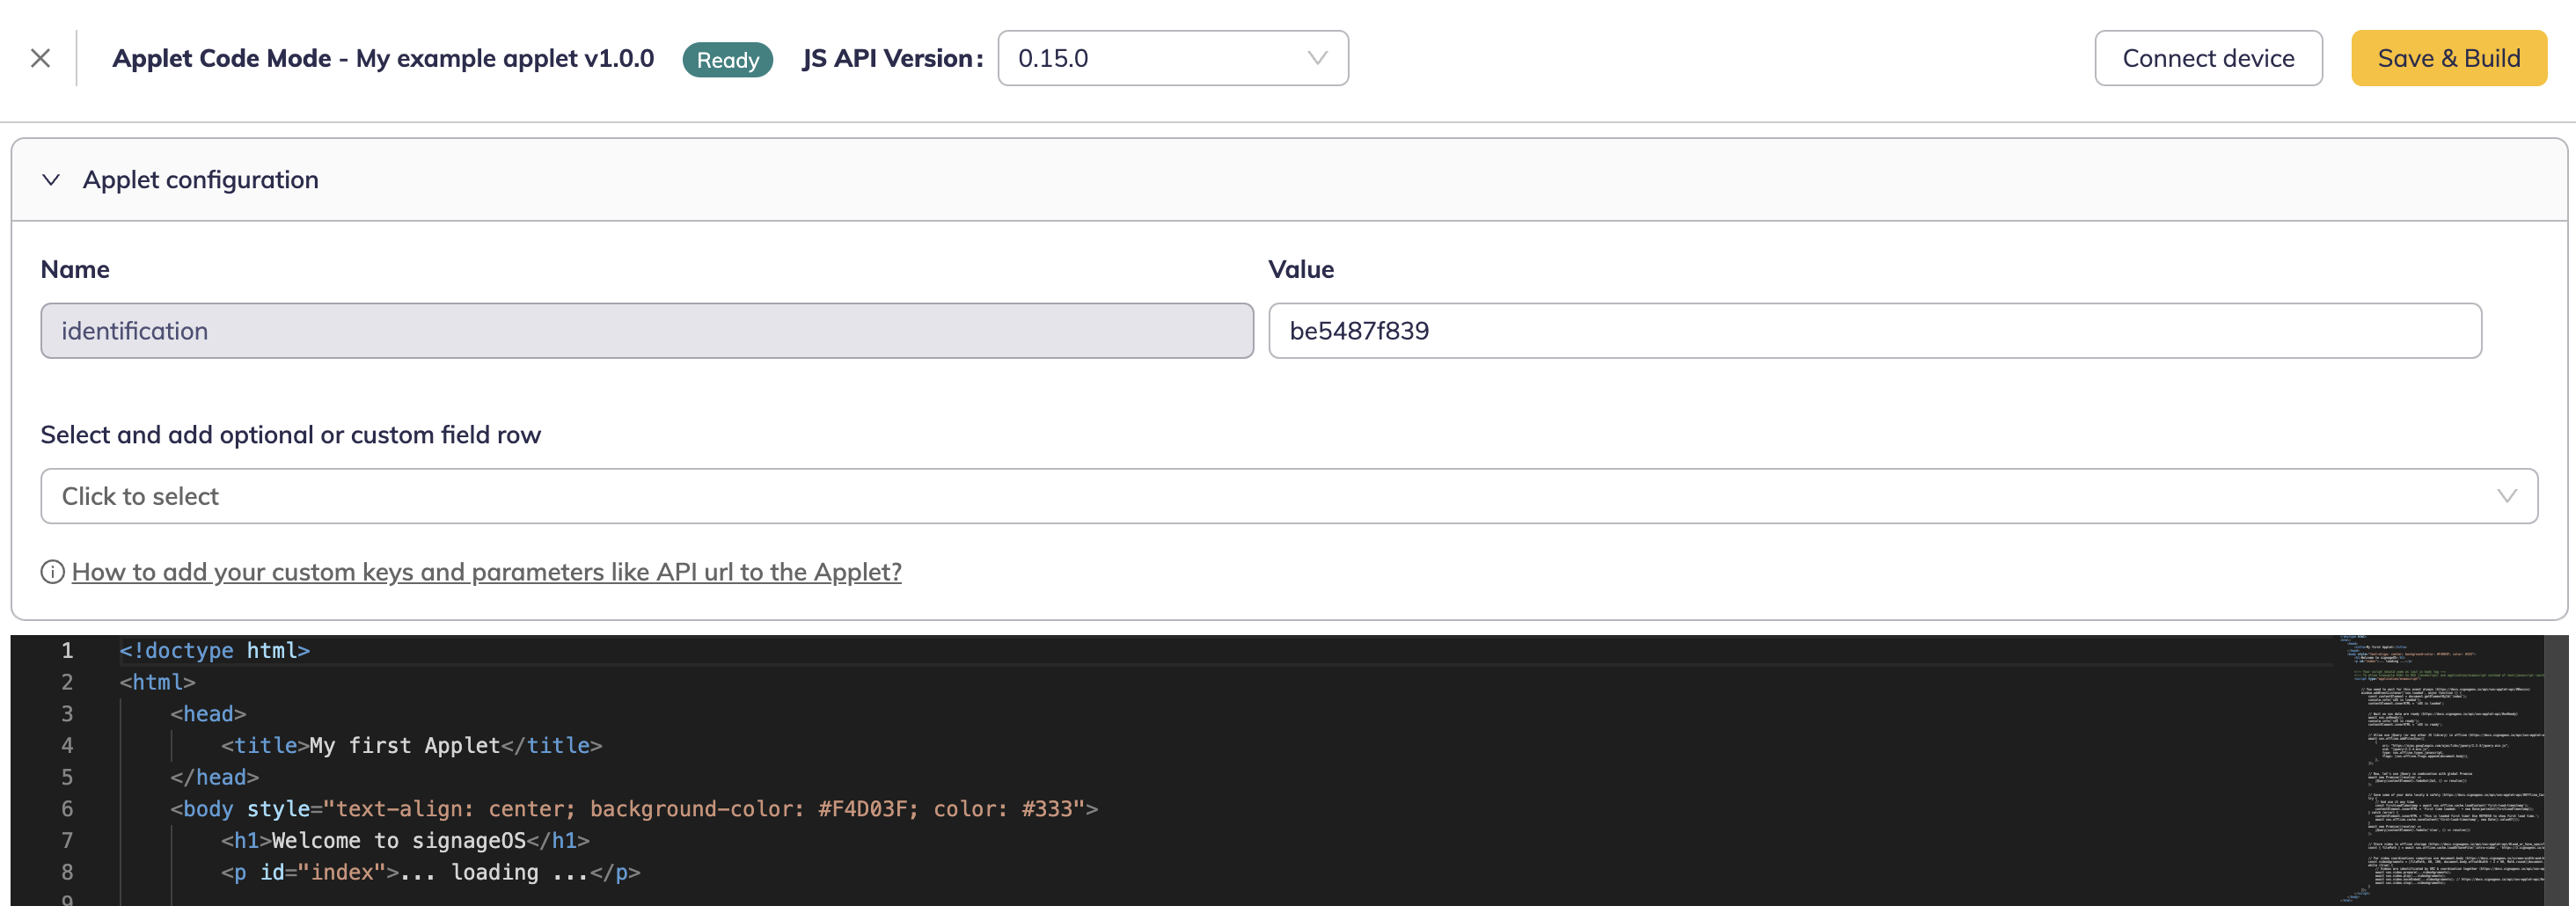
In the top right corner you can find Connect device - for ease of development you can click this button to show a panel containing your devices, allowing you to connect to the selected display and assign the Applet for live preview of your Applet on the device alongside with Power Actions for the displays.
To add a device input the device name into a search field and click the plus icon under Action column. Once your device has been added, you will be shown basic information such as screenshots, connection status, platform icon and quick access to Power Actions.
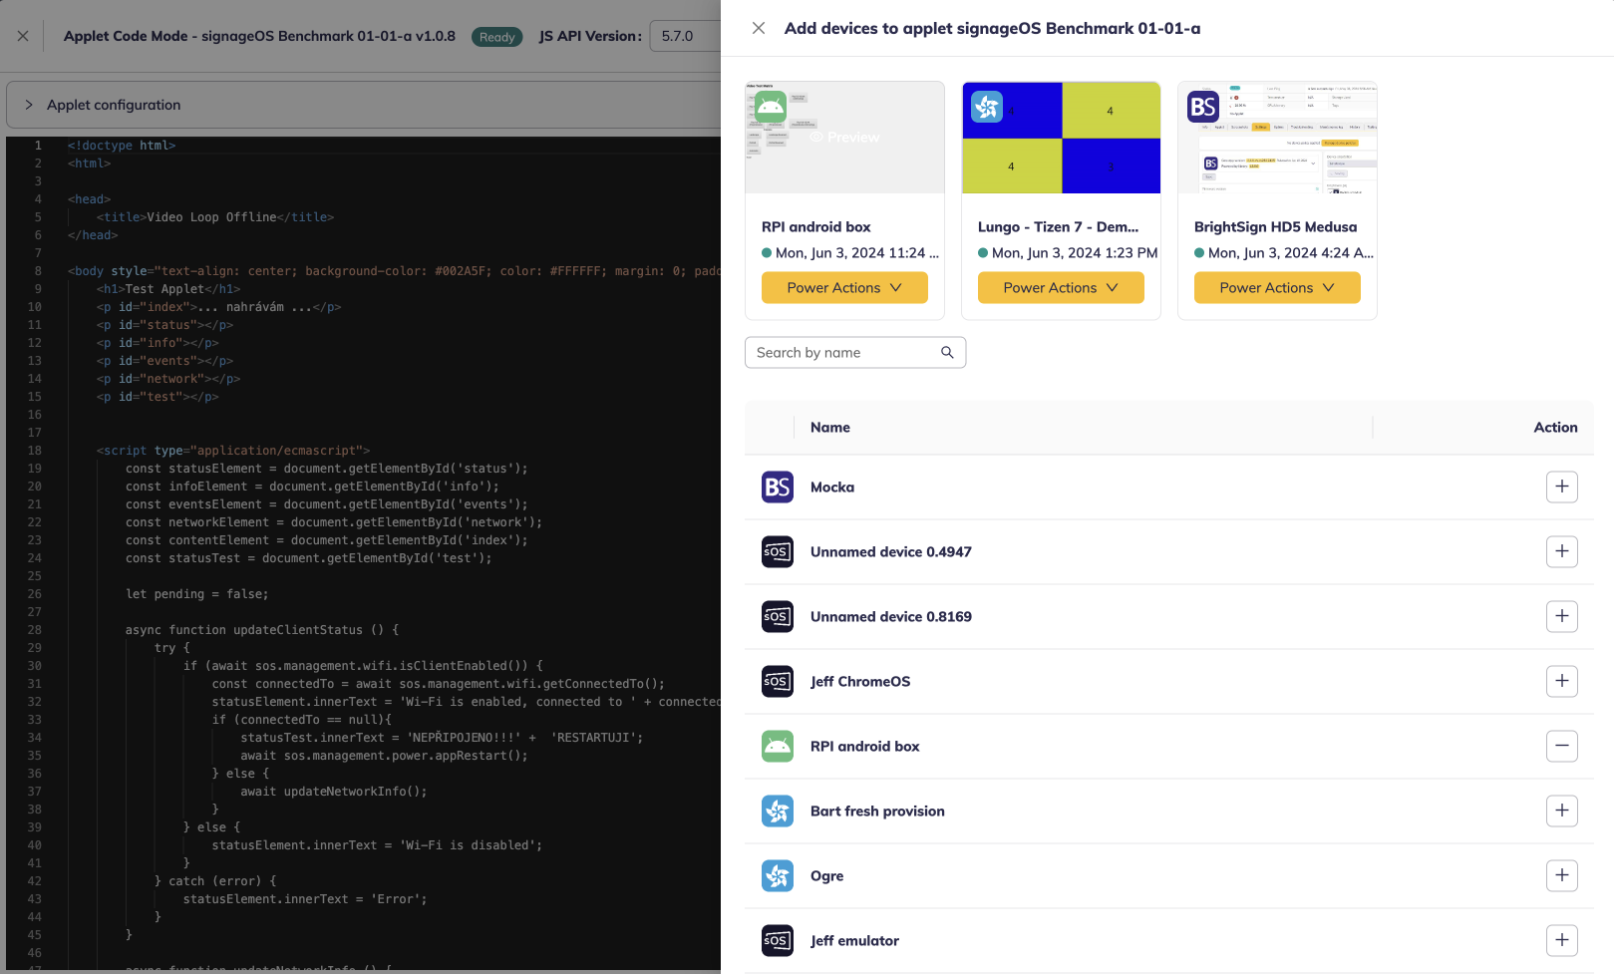
CLI Applet
For the CLI type you are developing the Applet directly in your own IDE and then uploading it to Box — either via the signageOS CLI tool, or by uploading your built application as an HTML package (ZIP) directly on the Applet detail page. More information about CLI can be found here.
The resulting overview of your Applet detail will differ in some ways. Firstly compared to Basic type your CLI Applet consists of several files, once uploaded you will be able to see all files that make up your Applet code base.
To create a new version of a CLI Applet, use the Create new version button in the Version section and pick a major, minor or patch version bump. In the opened drawer you can either upload a new HTML package (ZIP) for the selected version, or follow the shown sos applet upload command — the CLI takes the version from your project's package.json.
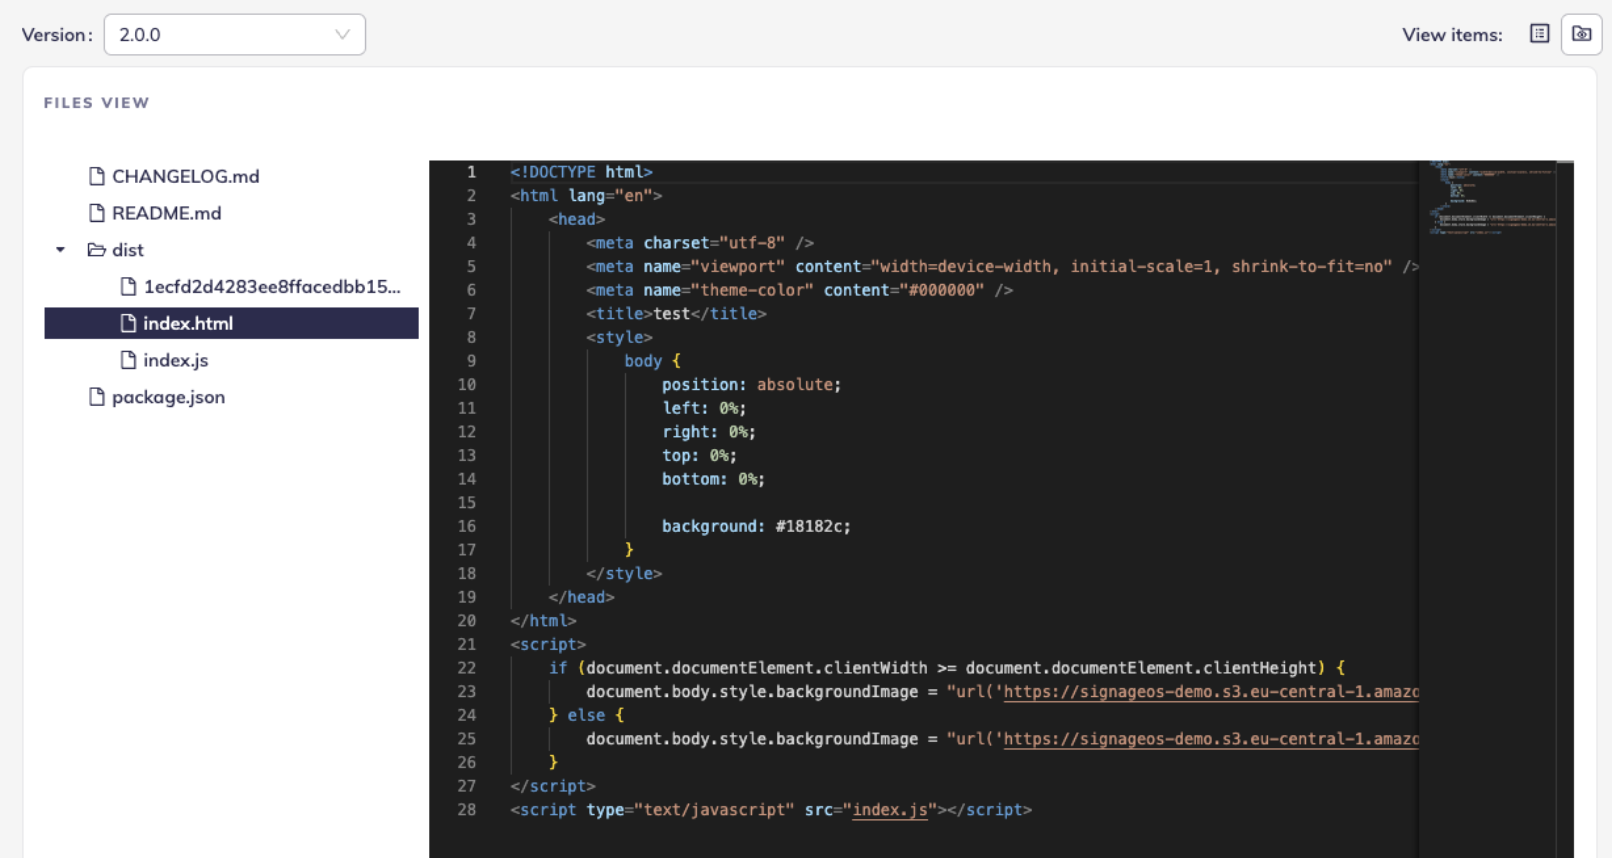
You can see necessary files created alongside with the Applet such as READMEs, Changelog or package.json.
CLI Type Applet will also list out your configuration setup, and the configuration definition can be edited in place — saved changes apply immediately, without re-uploading any files or rebuilding the version.
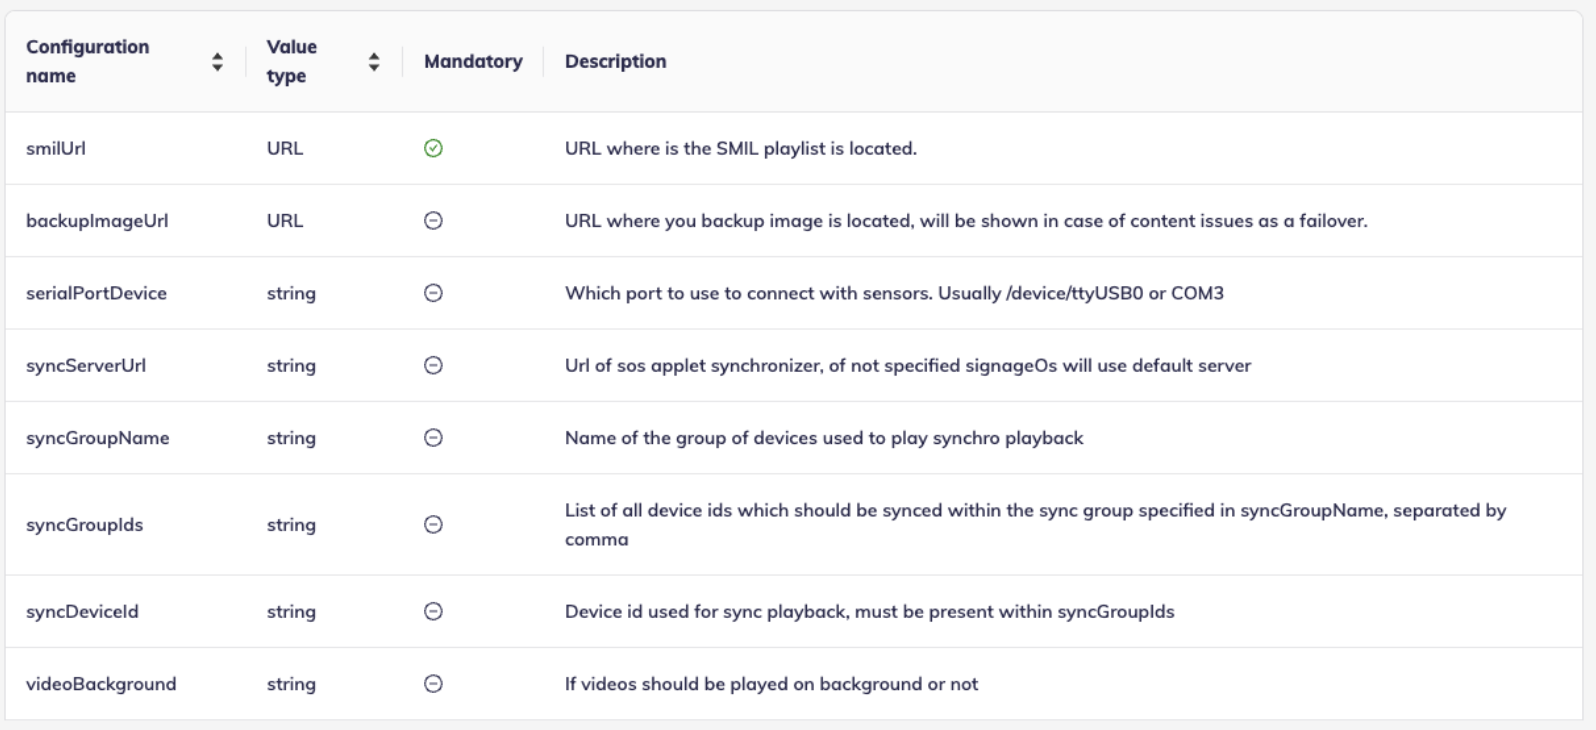
Deployment app
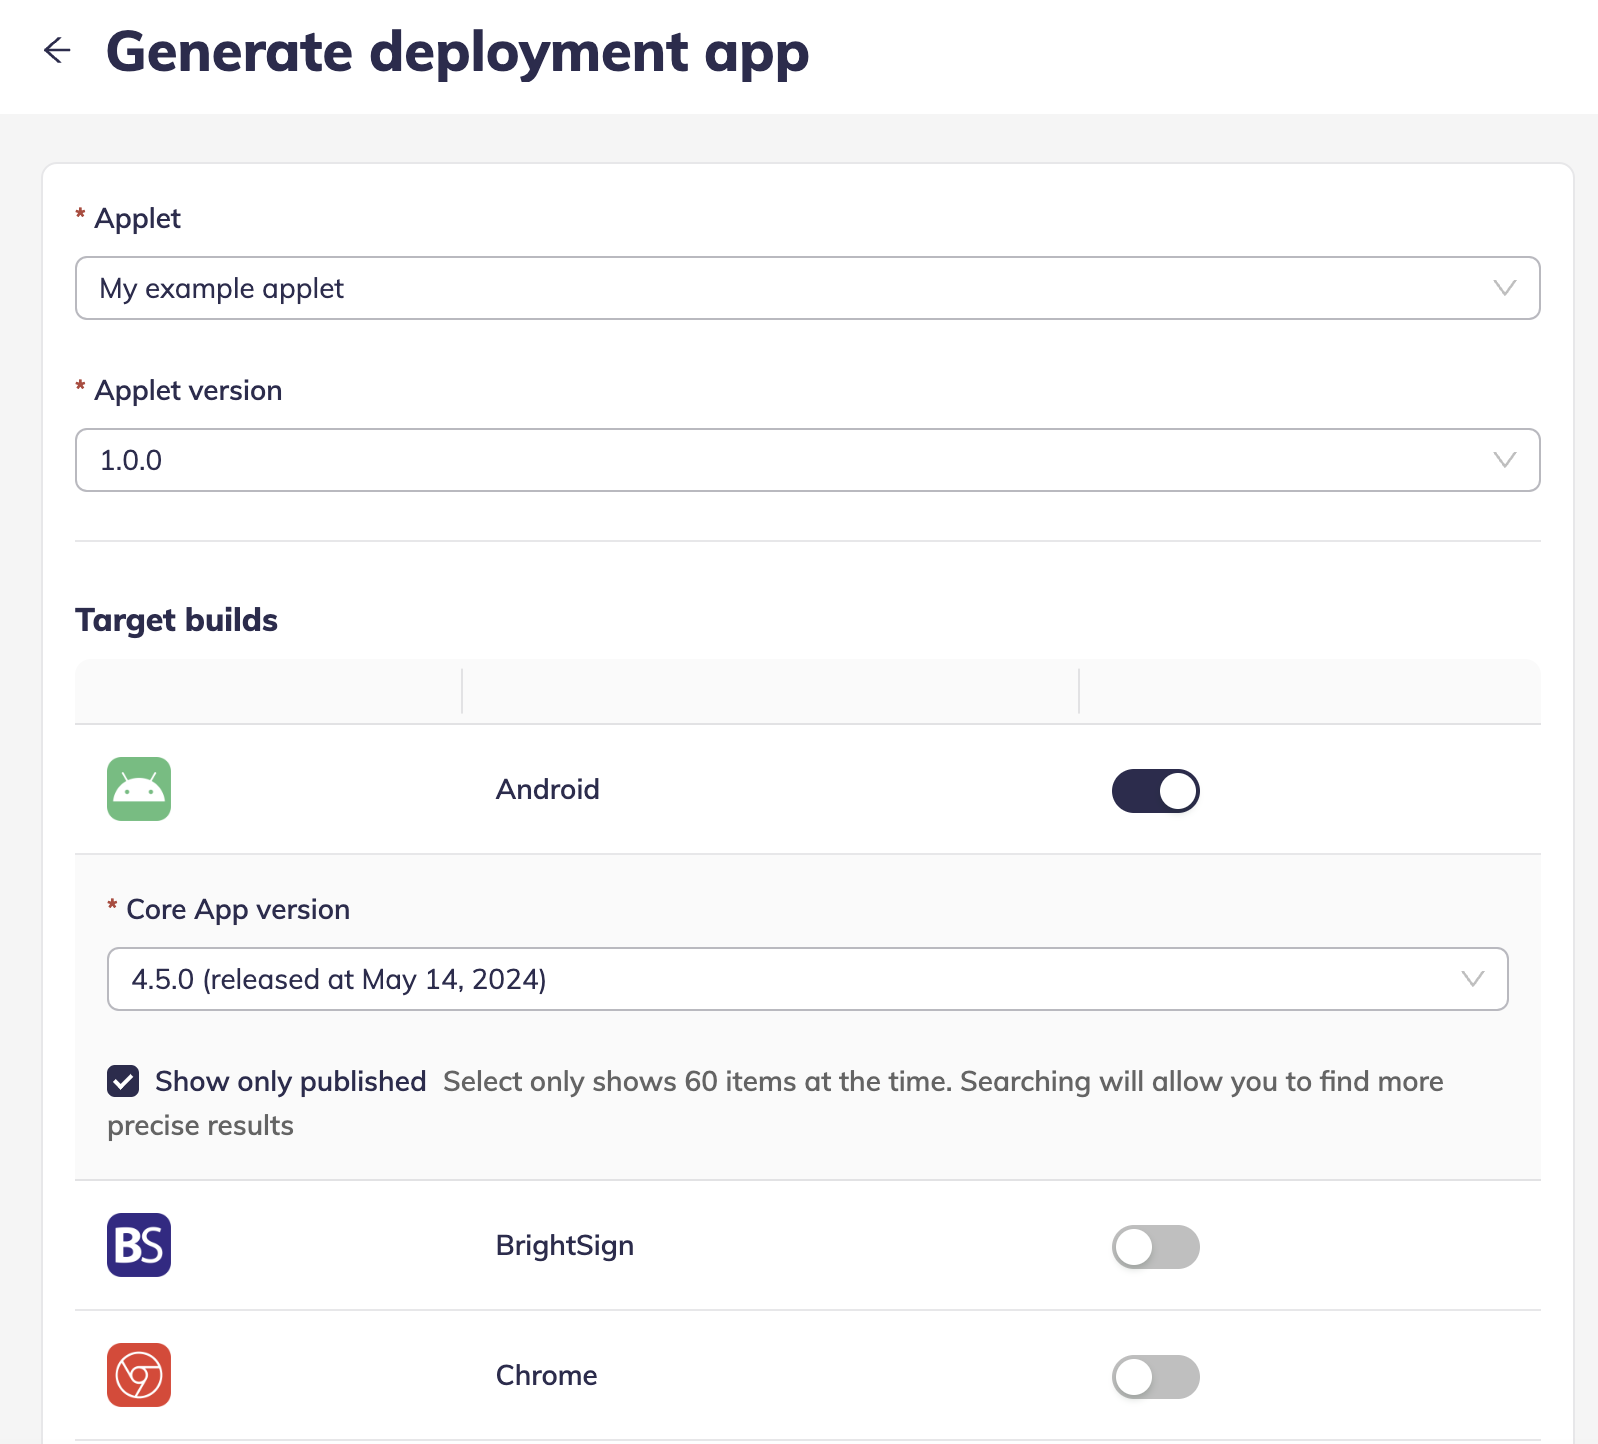
On the top right corner of the page you can find Generate deployment app button. The button is available once the Applet has at least one version. By clicking this button you will be offered platforms supported by signageOS, by selecting a platform an application containing your Applet will be created. By provisioning a display with this Deployment app your display will be automatically assigned to the Organization under which this Applet was created.