Supra Server
This article covers everything about the Supra Server: hardware prerequisites, provisioning, installation, and ongoing management through Box.
supraOnPremise · Plan: 👑 Add-on — not in a standard Device PlanPrerequisites
| Requirement | Detail |
|---|---|
| Operating System | Ubuntu 24.04 (mandatory) |
| Linux user (UID 1000) | The supra-server-daemon must be installed under the user with UID 1000. |
| Graphical session | The UID 1000 user must have an active graphical session (display server running). |
| Supra access | Your organization must have Supra access enabled. Request it via a support ticket, your sales representative, or the contact form. Supra access is managed through Feature Entitlements. |
| Custom Scripts | The device must report CUSTOM_SCRIPTS in its management capabilities. This capability is automatically available on Ubuntu devices provisioned with Cloud Control. |
Cloud Control mode (without frontend) is recommended for the Supra Server device. Running a full Core App with frontend on the Supra Server may cause unexpected side effects — see Known Limitations.
Recommended Hardware
The Supra Server requires an x86_64 Intel machine. ARM and AMD architectures are not supported. The table below provides general guidance — for enterprise deployments, contact signageOS for sizing recommendations based on your specific use case.
| Component | Recommendation |
|---|---|
| CPU | Intel x86_64 processor (13th gen or above recommended). More cores allow more concurrent client streams. |
| RAM | Minimum 8 GB. 16 GB or more recommended for deployments with many clients or 4K rendering. Especially for Chromium-heavy applications. |
| Storage | 20 GB or more for the OS, Supra daemon, and applet cache. |
| GPU | Modern integrated graphics is great for delivering 1080p. Dedicated graphics are not required. |
| Network | Gigabit Ethernet recommended for reliable delivery to client devices. |
Ubuntu Setup (Lab / Testing)
In production and enterprise deployments, Ubuntu installation and configuration is typically managed by your IT team. This section provides a quick-start guide for lab and testing environments.
To prepare a fresh machine for the Supra Server:
- Download the Ubuntu 24.04 LTS Desktop ISO.
- Install Ubuntu with default settings. The first user account created during installation will automatically have UID 1000, which is required by the Supra Server daemon.
- A graphical session (desktop environment) must be running — the Ubuntu Desktop installer configures this by default.
- Enable auto-login for the user account to ensure the graphical session starts automatically after a reboot:
- Open Settings → Users, unlock, and toggle Automatic Login to on.
- Connect the machine to a network with access to the signageOS cloud and to the local network where client devices are located.
Once Ubuntu is ready, proceed with provisioning below.
Step 1: Provision the Ubuntu Device
The Ubuntu device must be provisioned with the signageOS Cloud Control app before it can be managed from Box.
Run the following commands on the Ubuntu device:
wget https://linux-package-repository.signageos.io/ubuntu/provision.sh
chmod +x provision.sh
sudo ./provision.sh <organization UID> --disable-frontend
After provisioning, the device will appear in Box and can be managed remotely.
For more details on Ubuntu provisioning, see the Ubuntu provisioning documentation.
Step 2: Assign a Location
- In Box, create or select a Location for your Supra deployment.
- Navigate to the provisioned Ubuntu device and assign it to the Location.
- All client devices that should use this Supra Server must be assigned to the same Location.
Step 3: Install Supra Server
Once the device is provisioned and assigned to a Location:
- Navigate to the device detail page in Box.
- Open the Supra tab.
- Click Install Supra.
- Monitor the script output — it will install
supra-server-daemonand all required dependencies.
The installation script is idempotent — running it again will upgrade or downgrade the Supra Server to the latest version.
The Supra tab is only visible when all prerequisites are met. If you don't see the tab, check the Supra Tab Not Visible troubleshooting guide.
Step 4: Verify Installation
After installation completes:
- The Status section in the Supra tab should show Installed.
- The Connected Clients table will list all devices in the same Location.
- You can now enable Supra mode on client devices.
Upgrading or Downgrading
Click Install Supra again from the Supra tab. The install script is idempotent and will update to the latest available version.
Uninstalling
- Navigate to the device's Supra tab.
- Click Uninstall Supra.
This removes the supra-server-daemon package and related components from the device.
Supra Tab Reference
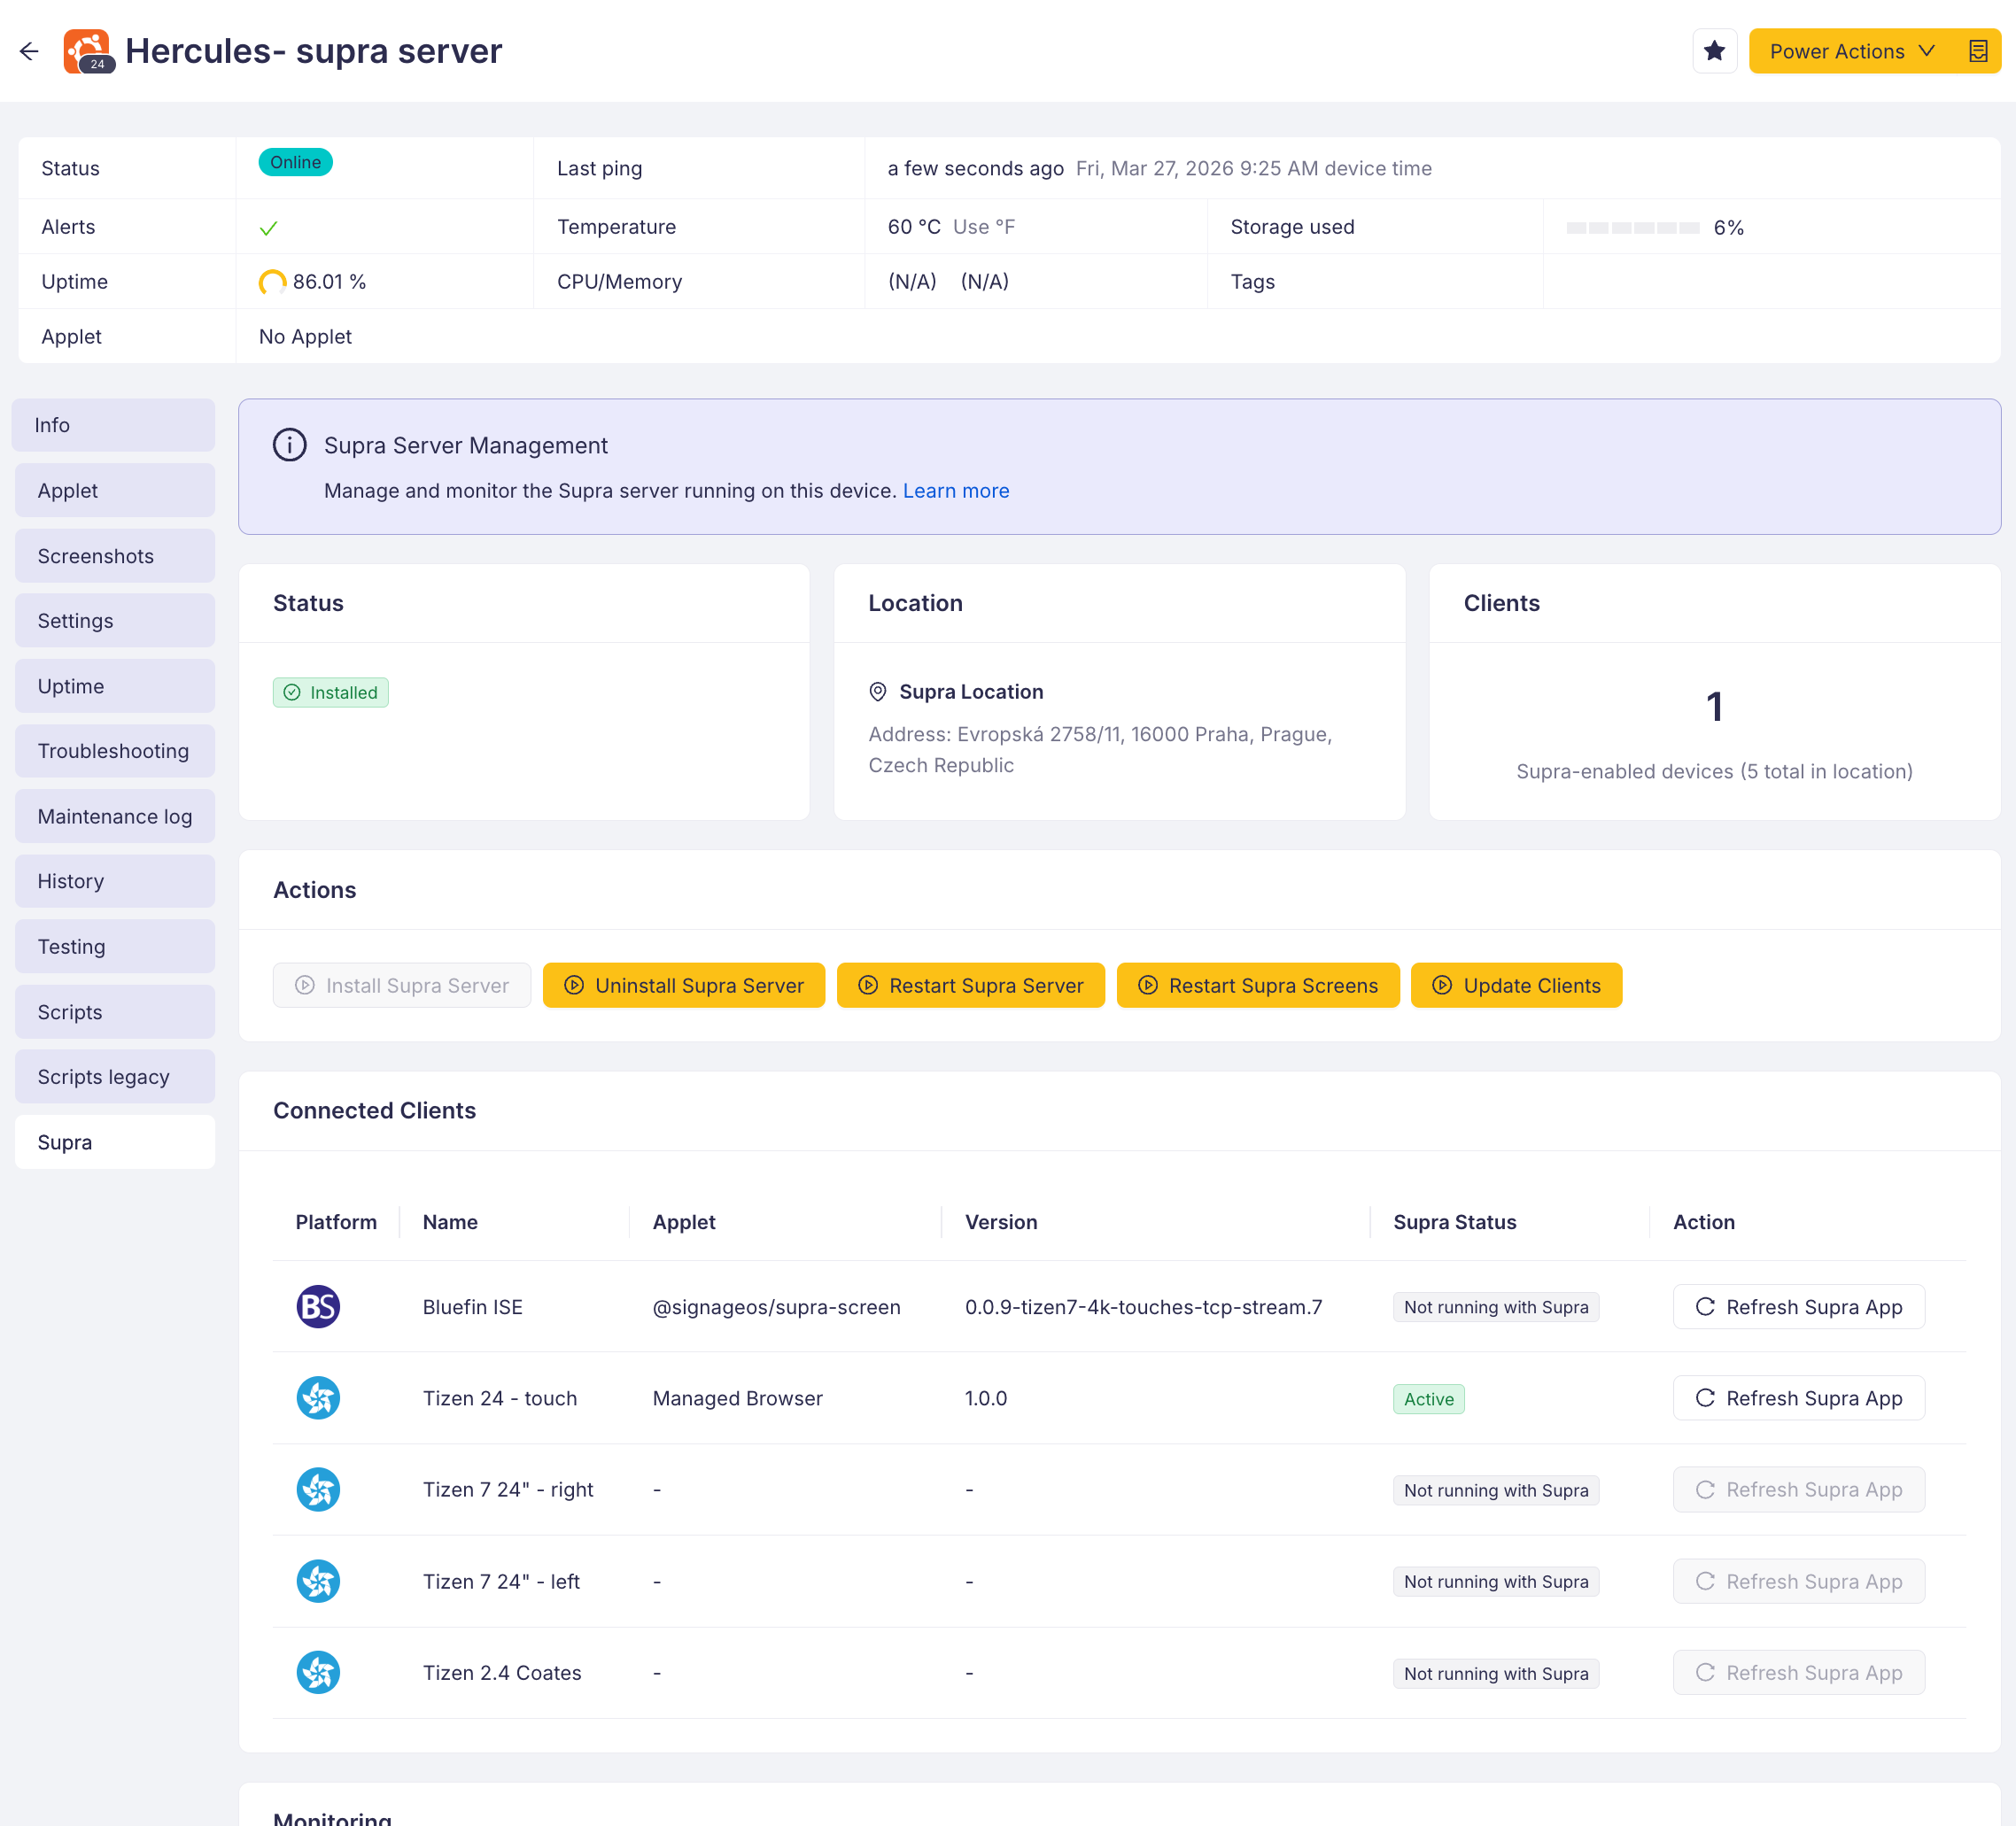
Navigate to Device Detail → Supra to access the management interface. The tab contains the following sections:
Info Box
An informational banner with a brief description of Supra and a link to the full documentation.
Status
- Installed — the
supra-server-daemonpackage is detected in the device's installed-packages telemetry. - Not Installed — the package has not been detected yet.
Location
Shows the Location assigned to the device (name, custom ID, address). If no Location is assigned, a warning is displayed.
Actions
| Action | Custom Script | Available When |
|---|---|---|
| Install Supra | supra-server-install-server | Supra is not installed |
| Uninstall Supra | supra-server-uninstall-server | Supra is installed |
| Restart Server | supra-server-restart-server | Supra is installed |
| Restart Screens | supra-server-restart-screens | Supra is installed |
Connected Clients
A table listing every device in the same Location (excluding the Supra Server itself):
| Column | Description |
|---|---|
| Platform | Device platform icon (Tizen, Android, Linux, etc.) |
| Name | Device name with a link to the device detail page |
| Applet | Name of the applet in the client's active timing |
| Applet Version | Version of the active applet |
| Status | Whether Supra mode is active (supra: enabled in timing configuration) |
| Action | A Refresh button that sends an APPLET_REFRESH power action to the client device |
Client Count
A summary card showing the number of clients with Supra mode enabled versus total client devices in the Location.
Monitoring
The Supra Server monitoring (Grafana-based) can be installed using the supra-server-install-monitoring Custom Script and accessed at
http://<supra-server-ip>:3000. See Monitoring for details.
Custom Scripts Reference
The following Custom Scripts are automatically provisioned when Supra access is enabled for your organization (via Feature Entitlements):
| Script | Description |
|---|---|
| Supra Server - install-server | Installs supra-server-daemon and all required dependencies. Main installation script. |
| Supra Server - install-monitoring | Installs the Grafana-based monitoring stack. See Monitoring. |
| Supra Server - update-clients | Updates Supra client components on connected devices. |
| Supra Server - restart-server | Restarts the Supra Server daemon. |
| Supra Server - kill-screens | Kills all screen sessions on the Supra Server. Useful for troubleshooting. |
| Supra Server - uninstall-server | Removes the Supra Server from the device. |
| Supra Server - get-metrics | Fetches raw Prometheus metrics from the Supra Server daemon. See Monitoring. |
These scripts can also be executed from the Scripts section on the device page if preferred over the Supra tab buttons.
Related Topics
- Supra Overview — General introduction to Supra
- Supra Client Management — Enabling and managing Supra mode on client devices
- TLS Setup — Enabling secure connections
- Known Limitations — Current limitations and workarounds